There are lots of options when it comes to recording a presentation and sharing it over the internet. This article will explain a few of them.
Loom
Loom is an app for creating and sharing screencasts. It is very user-friendly, and it is free for students.
One great feature is that Loom allows you to record from both your screen and your webcam at the same time, combining both into a single video. That way you can focus on your slides but allow your viewer to see your face in a little circle overlaid on the screen. You can choose the size and placement of the webcam overlay—be sure to consider this when making slides for a Loom recording.
Another great feature of Loom is that it hosts the videos you create, allowing you to share them with just a link or embed them easily into other pages. No need to compress anything or find a way to upload it to another service somewhere.

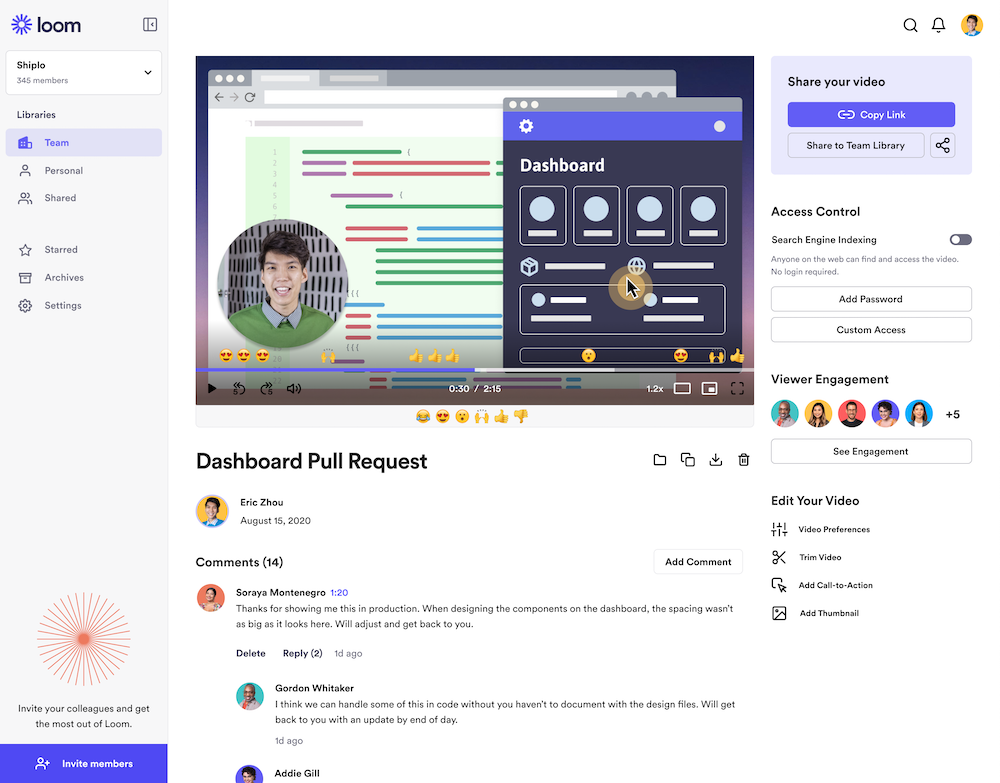
The dashboard page on Loom gives simple options for sharing your work.
Loom
One downside to Loom is that you generally can't edit your videos after the fact°, nor can you splice together multiple videos into a single stream. If you choose to go with Loom, you'll need to settle on a single speaker for your presentation, and he or she will have to get the whole thing right in a single take or begin recording again from the top.
The Loom for Education page contains simple tutorials to get you started, and the Help Center has links to all kinds of additional tutorials if you need them.
Zoom
Zoom isn't screencasting software, but since you can record a meeting, it works fine for recording digital presentations.
The benefit of using Zoom is that you can have multiple participants in the meeting, making it easy to have multiple speakers during the presentation. You can also share slides and see the faces of the presenters at the same time, like in Loom, though it doesn't look as polished or nice.
Once you've set everything up for the presentation, the host just needs to click the record button on the Zoom control panel and choose whether to save the recording to their computer or to the cloud.

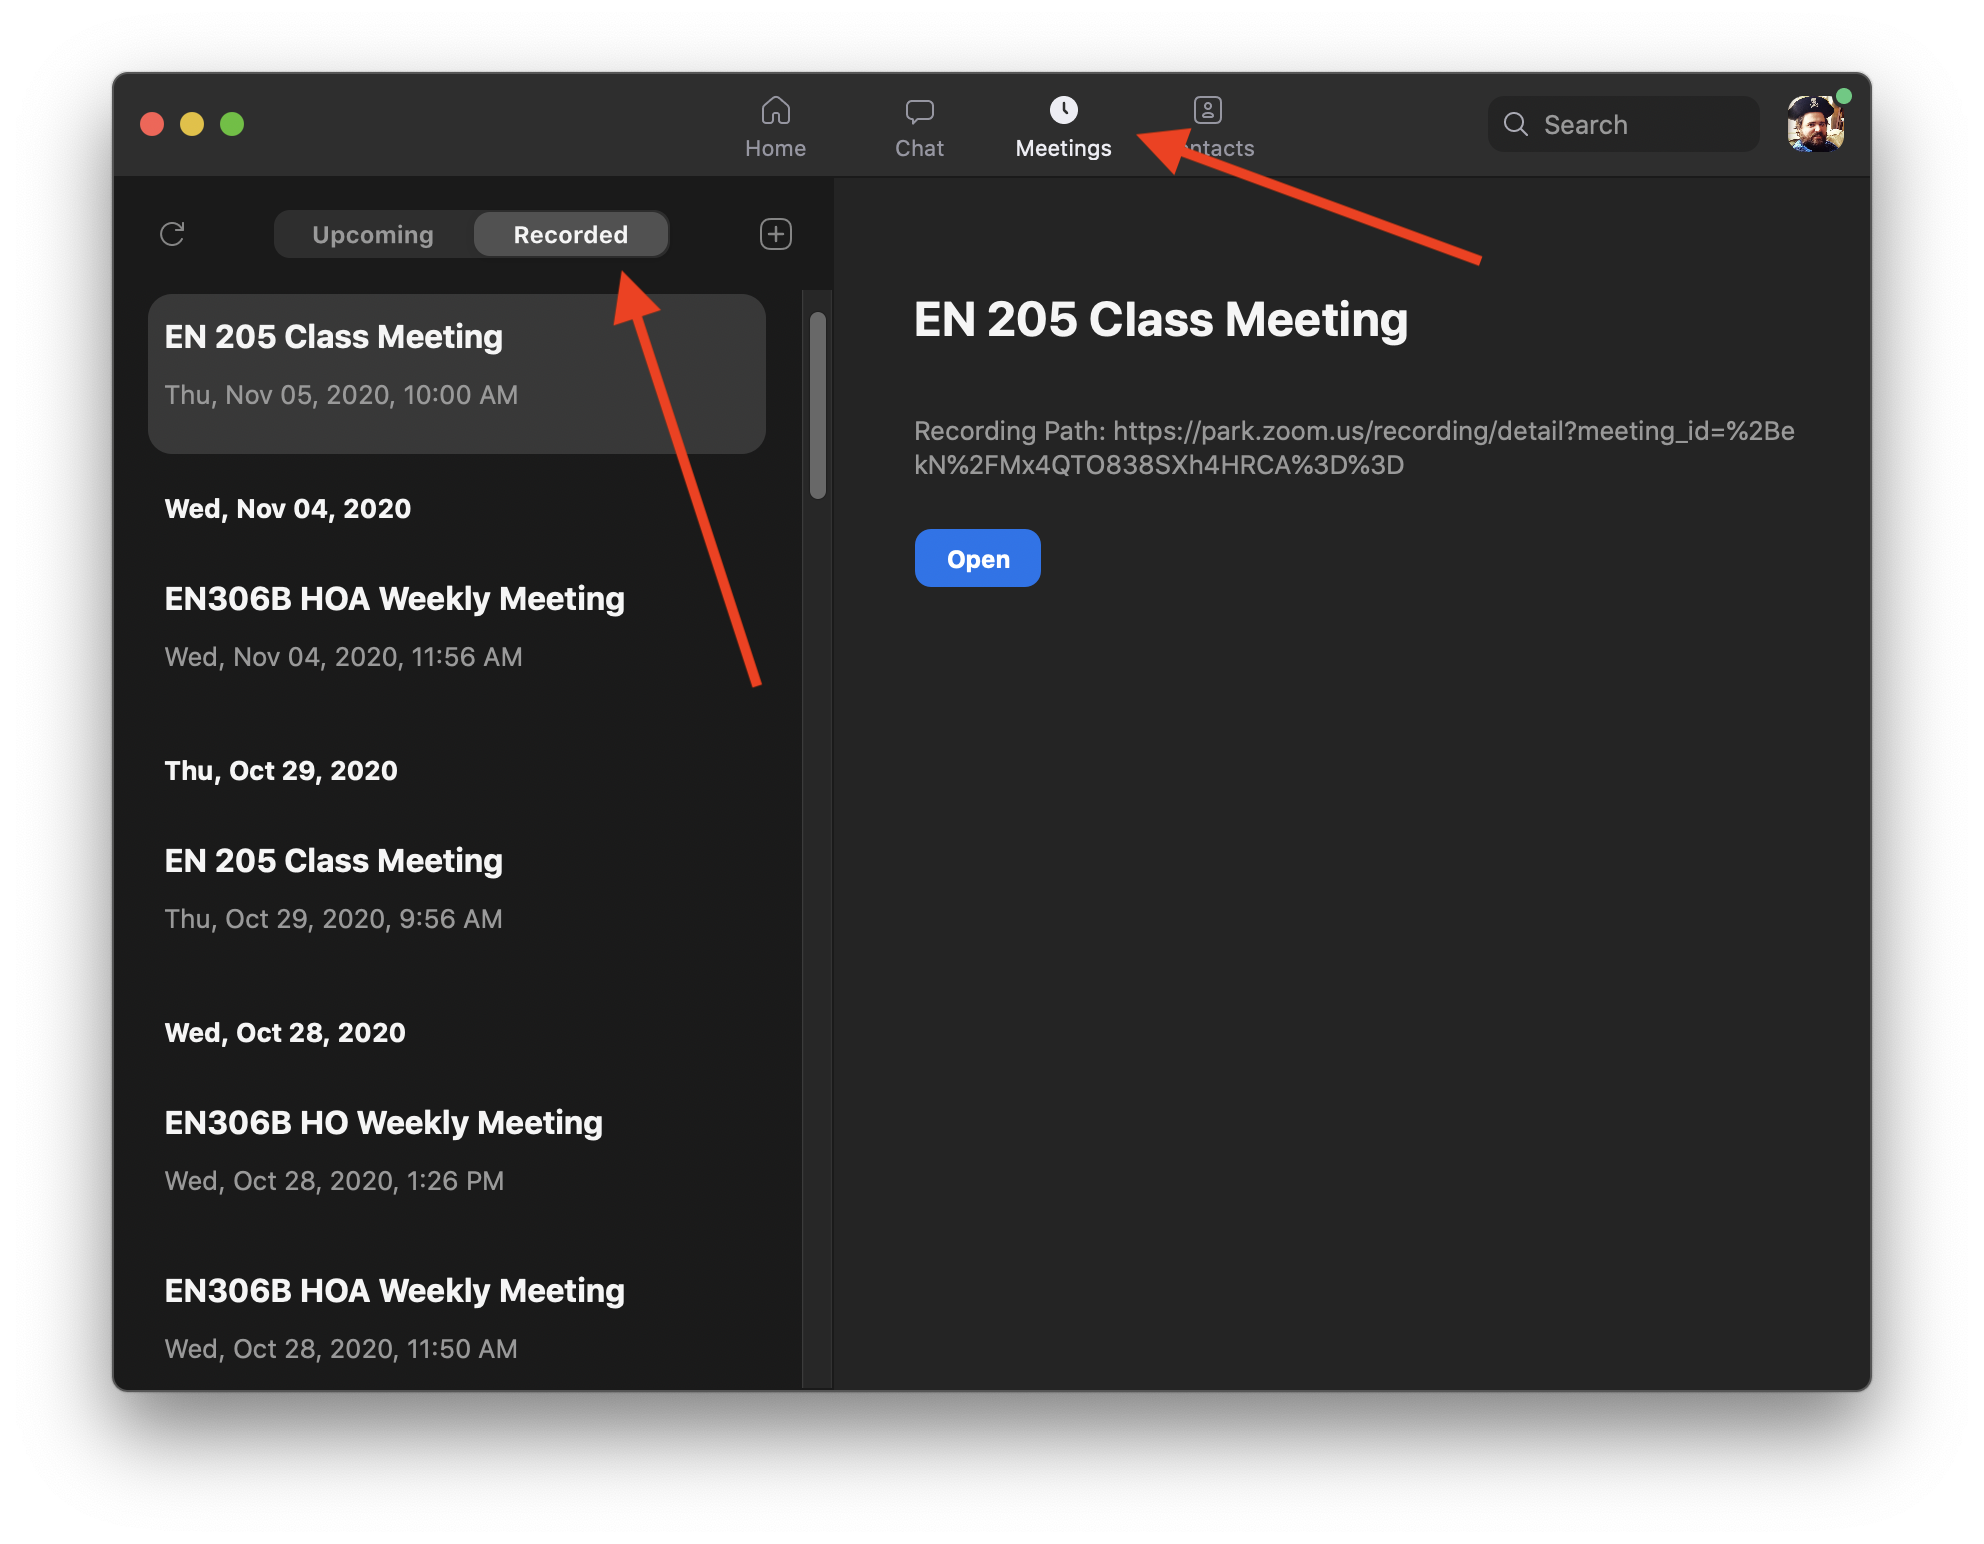
If you save to the cloud, you can access the recording for sharing by clicking the meetings tab of the Zoom window, then choosing "Recorded" on the left.
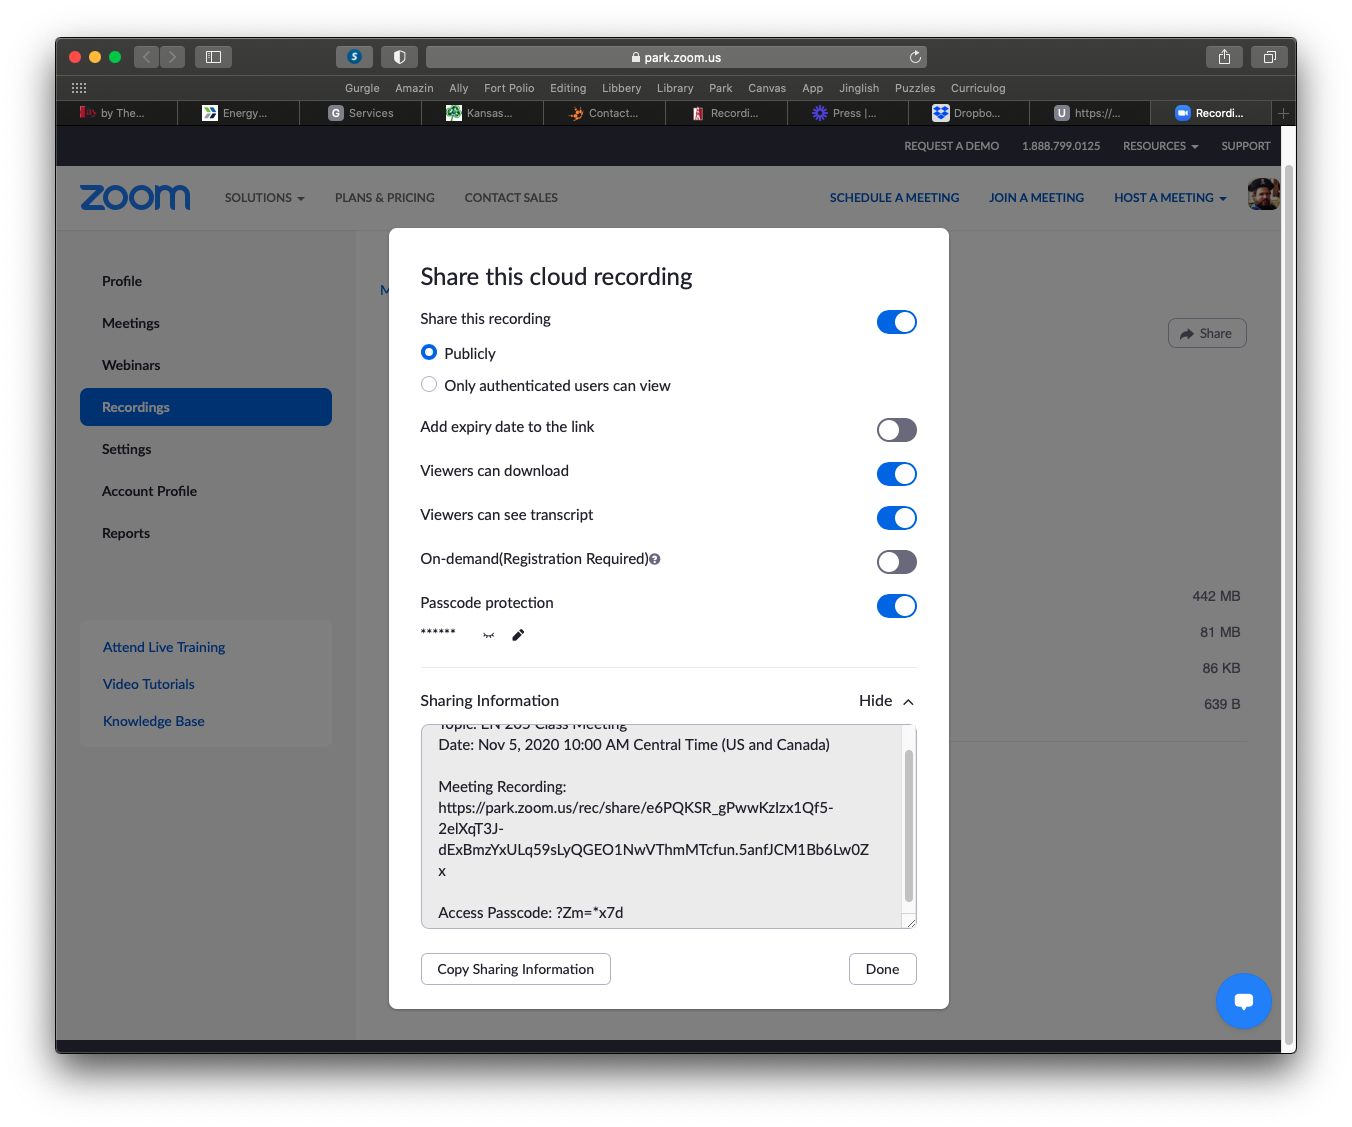
If you record to the cloud, you can share the video by sharing the link to it. The best way to do this is to click "Open" when viewing the recording on the Zoom app (see above picture), and then choose "Share" on the website that opens. From there you can ensure the video is publicly available (I recommend turning Passcode Protection off) and copy the link from the "Sharing Information" area.

The web interface for sharing Zoom recordings.
If you record to your computer, you'll need to post the video to the internet—see below for details.
Snagit
If you're interested in maximizing your editing abilities, then Snagit may be for you. This robust recording software offers a huge number of options and functions that can be used before, during, and even after you record—from focusing in on only part of the screen, to toggling between screen and webcam, to extensive post-shoot editing, to adding image overlays and more.
Snagit is proprietary software, but Techsmith offers a generous free trial period. They also have extensive tutorials, such as this basic overview.
Post a Video to the Web
If your video is saved your computer, you'll need to host the video file (usually an .mpeg or .m4v file) on the internet for others to see it. Here are a few options:
- The simplest thing to do is to upload it to YouTube, which takes care of compressing and processing the file. You can set the video to be "Unlisted" so that only those with the link can see it. Then it's a simple matter of sharing the link.
- Another option would be to put the file in your Google Drive or Dropbox, assuming you have enough room there to spare.° Then just click the share buttons to find a link you can share.
Need Help?
Never fear! Just contact your instructor for help.


